Daha önceki makalemizde Nginx ve PHP kurulumundan bahsetmiştik. Bu makalede de devamı niteliğinde olacak MySQL 5.7 kurulumu ile veritabanımızı kolay yönetebilmek için de PhpMyAdmin kurulumundan bahsedeceğiz.
İlk önce SCLo paketini sistemimize tanımlamak için aşağıdaki komutları sırasıyla giriniz.
[root@zulfumehmet /]# yum -y install centos-release-scl-rh centos-release-scl
[root@zulfumehmet /]# sed -i -e "s/\]$/\]\npriority=10/g" /etc/yum.repos.d/CentOS-SCLo-scl.repo
[root@zulfumehmet /]# sed -i -e "s/\]$/\]\npriority=10/g" /etc/yum.repos.d/CentOS-SCLo-scl-rh.repo
[root@zulfumehmet /]# sed -i -e "s/enabled=1/enabled=0/g" /etc/yum.repos.d/CentOS-SCLo-scl.repo
[root@zulfumehmet /]# sed -i -e "s/enabled=1/enabled=0/g" /etc/yum.repos.d/CentOS-SCLo-scl-rh.repo

[root@zulfumehmet /]# yum --enablerepo=centos-sclo-rh install
[root@zulfumehmet /]# yum --enablerepo=centos-sclo-sclo install
Şimdi SCLo paketi tamam şimdi MySQL 5.7 Kurulumunu gerçekleştirmek için aşağıdaki komutları girelim.
[root@zulfumehmet /]# yum --enablerepo=centos-sclo-rh -y install rh-mysql57-mysql-server

[root@zulfumehmet /]# scl enable rh-mysql57 bash
Mysql Sürümümüzü kontrol edelim
[root@zulfumehmet /]# mysql -V
mysql Ver 14.14 Distrib 5.7.16, for Linux (x86_64) using EditLine wrapper
MySQL yolumuzu bakalım
[root@zulfumehmet /]# which mysql
/opt/rh/rh-mysql57/root/usr/bin/mysql
rh-mysql57.sh adında bir script oluşturalım
[root@zulfumehmet /]# nano /etc/profile.d/rh-mysql57.sh
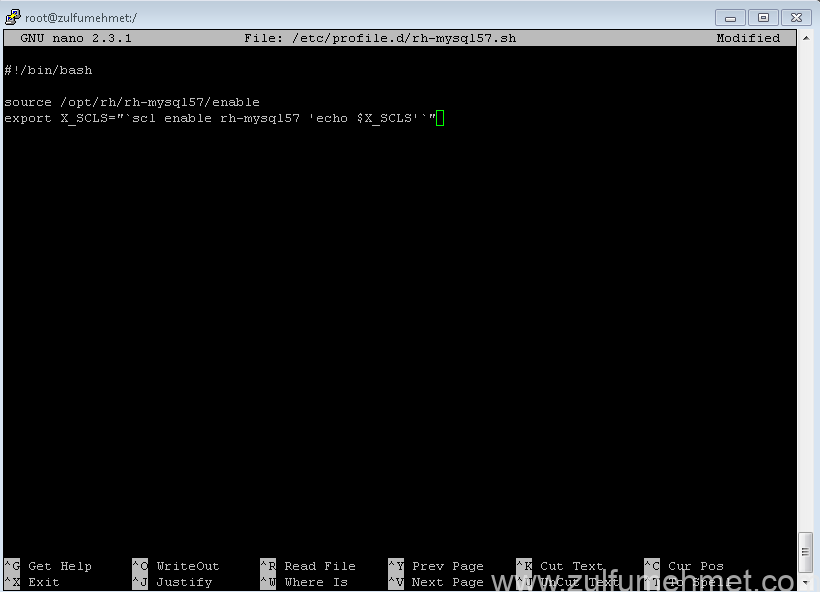
içine bu komutları ekleyelim
#!/bin/bash

source /opt/rh/rh-mysql57/enable
export X_SCLS="`scl enable rh-mysql57 'echo $X_SCLS'`"
Kaydedip çıkıyoruz.
rh-mysql57-mysql-server.cnf dosyasına bir ekleme yapalım.
[root@zulfumehmet /]# nano /etc/opt/rh/rh-mysql57/my.cnf.d/rh-mysql57-mysql-server.cnf
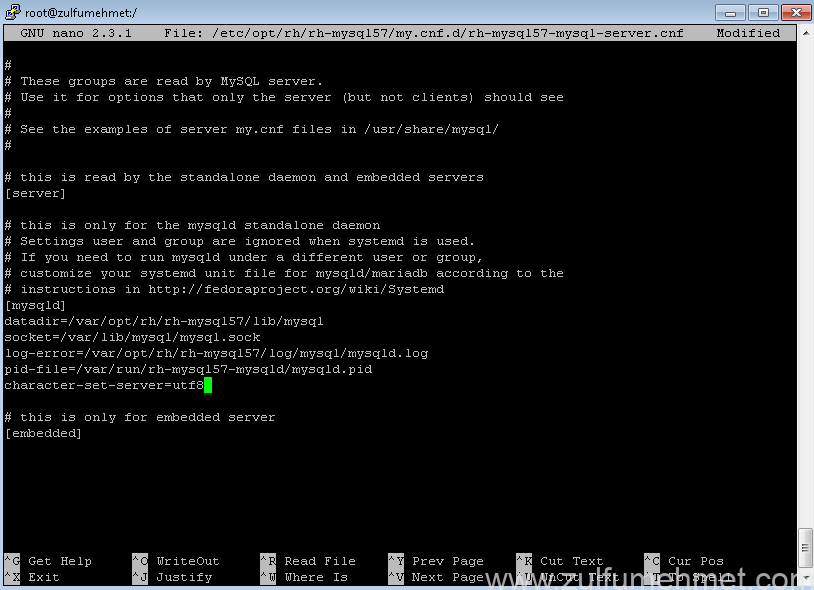
Aşağıdaki kodu [mysqld] kısmına ekleyelim
character-set-server=utf8
Mysql başlatalım ve reboot durumlarında otomatik başlamasını sağlayalım
[root@zulfumehmet /]# systemctl start rh-mysql57-mysqld
[root@zulfumehmet /]# systemctl enable rh-mysql57-mysqld
Güvenlik yapısını oluşturalım
[root@zulfumehmet /]# mysql_secure_installation

Securing the MySQL server deployment.

Connecting to MySQL using a blank password.

VALIDATE PASSWORD PLUGIN can be used to test passwords
and improve security. It checks the strength of password
and allows the users to set only those passwords which are
secure enough. Would you like to setup VALIDATE PASSWORD plugin?

Press y|Y for Yes, any other key for No: y

There are three levels of password validation policy:

LOW Length >= 8
MEDIUM Length >= 8, numeric, mixed case, and special characters
STRONG Length >= 8, numeric, mixed case, special characters and dictionary file

Please enter 0 = LOW, 1 = MEDIUM and 2 = STRONG: 0
Please set the password for root here.

New password:

Re-enter new password:

Estimated strength of the password: 50
Do you wish to continue with the password provided?(Press y|Y for Yes, any other key for No) : y
By default, a MySQL installation has an anonymous user,
allowing anyone to log into MySQL without having to have
a user account created for them. This is intended only for
testing, and to make the installation go a bit smoother.
You should remove them before moving into a production
environment.

Remove anonymous users? (Press y|Y for Yes, any other key for No) : y
Success.
Normally, root should only be allowed to connect from
'localhost'. This ensures that someone cannot guess at
the root password from the network.

Disallow root login remotely? (Press y|Y for Yes, any other key for No) : y
Success.

By default, MySQL comes with a database named 'test' that
anyone can access. This is also intended only for testing,
and should be removed before moving into a production
environment.
Remove test database and access to it? (Press y|Y for Yes, any other key for No) : y
- Dropping test database...
Success.

- Removing privileges on test database...
Success.

Reloading the privilege tables will ensure that all changes
made so far will take effect immediately.

Reload privilege tables now? (Press y|Y for Yes, any other key for No) : y
Success.

All done!
Mysql erişim sağlayalım
[root@zulfumehmet /]# mysql -u root -p
Enter password:
Welcome to the MySQL monitor. Commands end with ; or \g.
Your MySQL connection id is 4
Server version: 5.7.16 MySQL Community Server (GPL)

Copyright (c) 2000, 2016, Oracle and/or its affiliates. All rights reserved.

Oracle is a registered trademark of Oracle Corporation and/or its
affiliates. Other names may be trademarks of their respective
owners.

Type 'help;' or '\h' for help. Type '\c' to clear the current input statement.

mysql>exit
Bye
Mysql kurulumumuz bitti. Şimdi PhpMyAdmin Kurulumuna geçelim
Diğer makalemizde Epel-Release paketini kurduğumuz için tekrar kurmamıza gerek yok.
[root@zulfumehmet /]# yum --enablerepo=epel -y install phpMyAdmin php-mysql php-mcrypt
Kurulum bitti bir kaç ufak ayar yapalım
index.php dosyasını açılış sayflarından biri olarak ayarlamak için nginx dosyasını editleyelim
[root@zulfumehmet]# nano /etc/nginx/nginx.conf
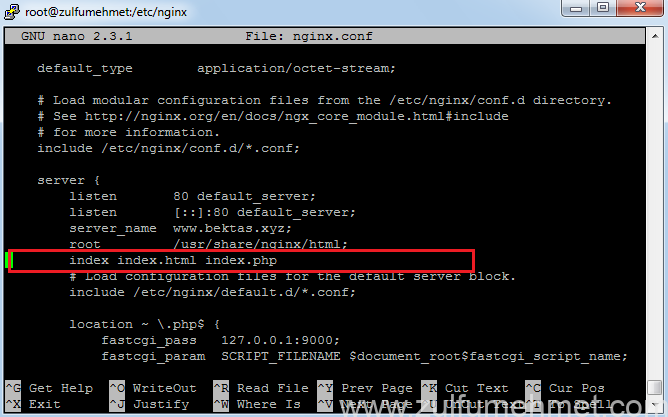
Aşağıdaki komutları ekleyelin
index index.html index.php
Kaydetip çıktıktan sonra aşağıdaki komutları girelim (Büyük küçük harf duyarlı olabilir Büyük küçük harf giriniz) ardından servisleri resetleyelim
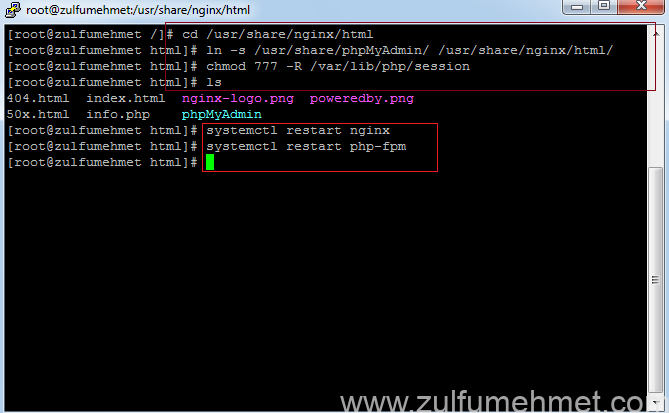
[root@zulfumehmet /]# cd /usr/share/nginx/html
[root@zulfumehmet html]# ln -s /usr/share/phpMyAdmin/ /usr/share/nginx/html/
[root@zulfumehmet html]# chmod 777 -R /var/lib/php/session
[root@zulfumehmet html]# ls

[root@zulfumehmet html]# systemctl restart nginx
[root@zulfumehmet html]# systemctl restart php-fpm
[root@zulfumehmet html]#
Web tarayıcıdan girelim phpmyadmine
http://ip_adresiniz/phpMyAdmin/
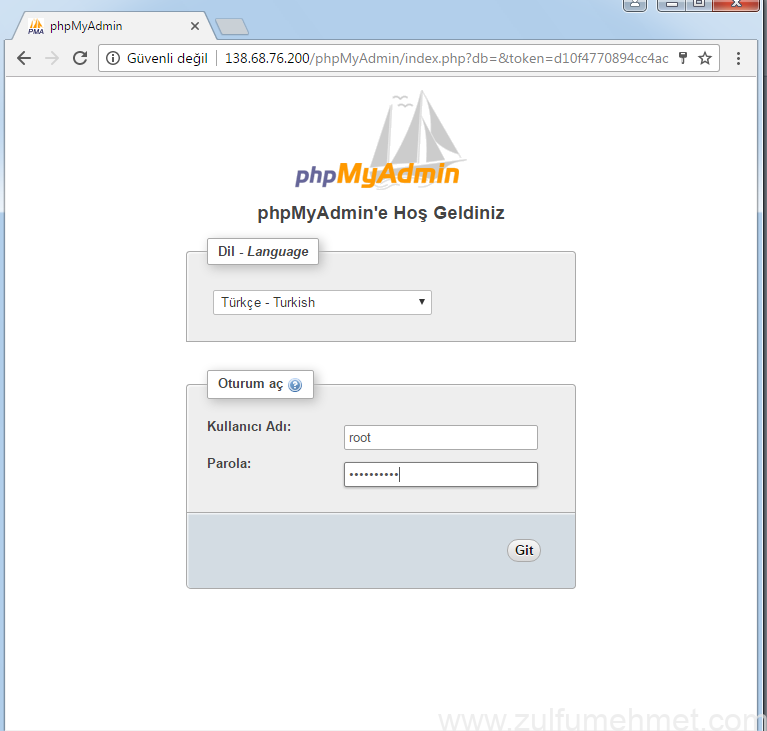
Giriş yapmak için root bilgilerimizi girelim.
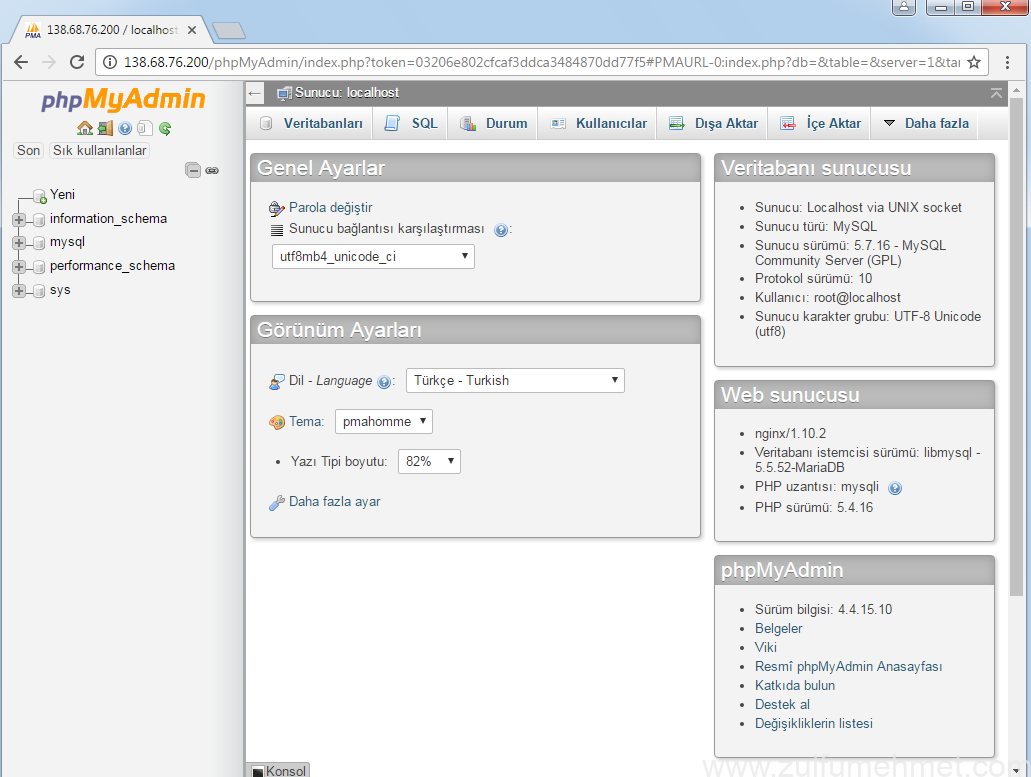
Bu makale de de MySQL 5,7 ile PhpMyAdmin kurulumunu gerçekleştirdik. Diğer makalemizde de Bind DNS, Host oluşturma ve FTP erişimi nasıl sağlaya bileceğinize değineceğim.
Centos 7 Nginx, Php, MySQL, PhpMyAdmin, BindDNS, Host ve FTP Kurulum Yazı Dizisi
1 – Centos 7 Nginx Ve PHP Kurulumu
2 – Centos 7 Nginx İle MySQL ve PhpMyAdmin Kurulumu
3 – Centos 7 Nginx İle BindDNS, Host ve FTP Kurulumu
Kolay Gelsin


Phpmyadmini açamadım. No found hatası alıyorum.
Büyük küçük harf duyarlı olabilir. phpMyAdmin olarak giriş yapmayı deneyiniz. ipadresiniz/phpMyAdmin
Phpmyadmin 403 Forbidden hatası veriyor.
Büyük küçük harf uyumuna dikkat ediyor musunuz? Örnek sunucuipadresi/phpMyAdmin olarak giriş yapınız.
Mysql’in optimizasyonu ile ilgili yazı hazırlamayı düşünüyor musunuz ?
Conf dosyalarının revize edilmesi. Ama CPU sayısı ve RAM miktarına göre en iyi konfigüre ayarları gibi. Örneğin 4 GB’lı bir VDS’de bu ayarlarnı. 16 GB’da bu ayarlanır gibi. Ya da aynı şekilde CPU sayısına göre değişebilir. Ya da site hitine göre ya da sistemdeki kullanıcı sayısına göre gibi.
Belirli bir formül’ü ve dikkat edilmesi gerekenler (Güvenlik + Hız) ile ilgili yazı yazabilme imkanınız olur ise çok sevinirim.